Rock Zombie
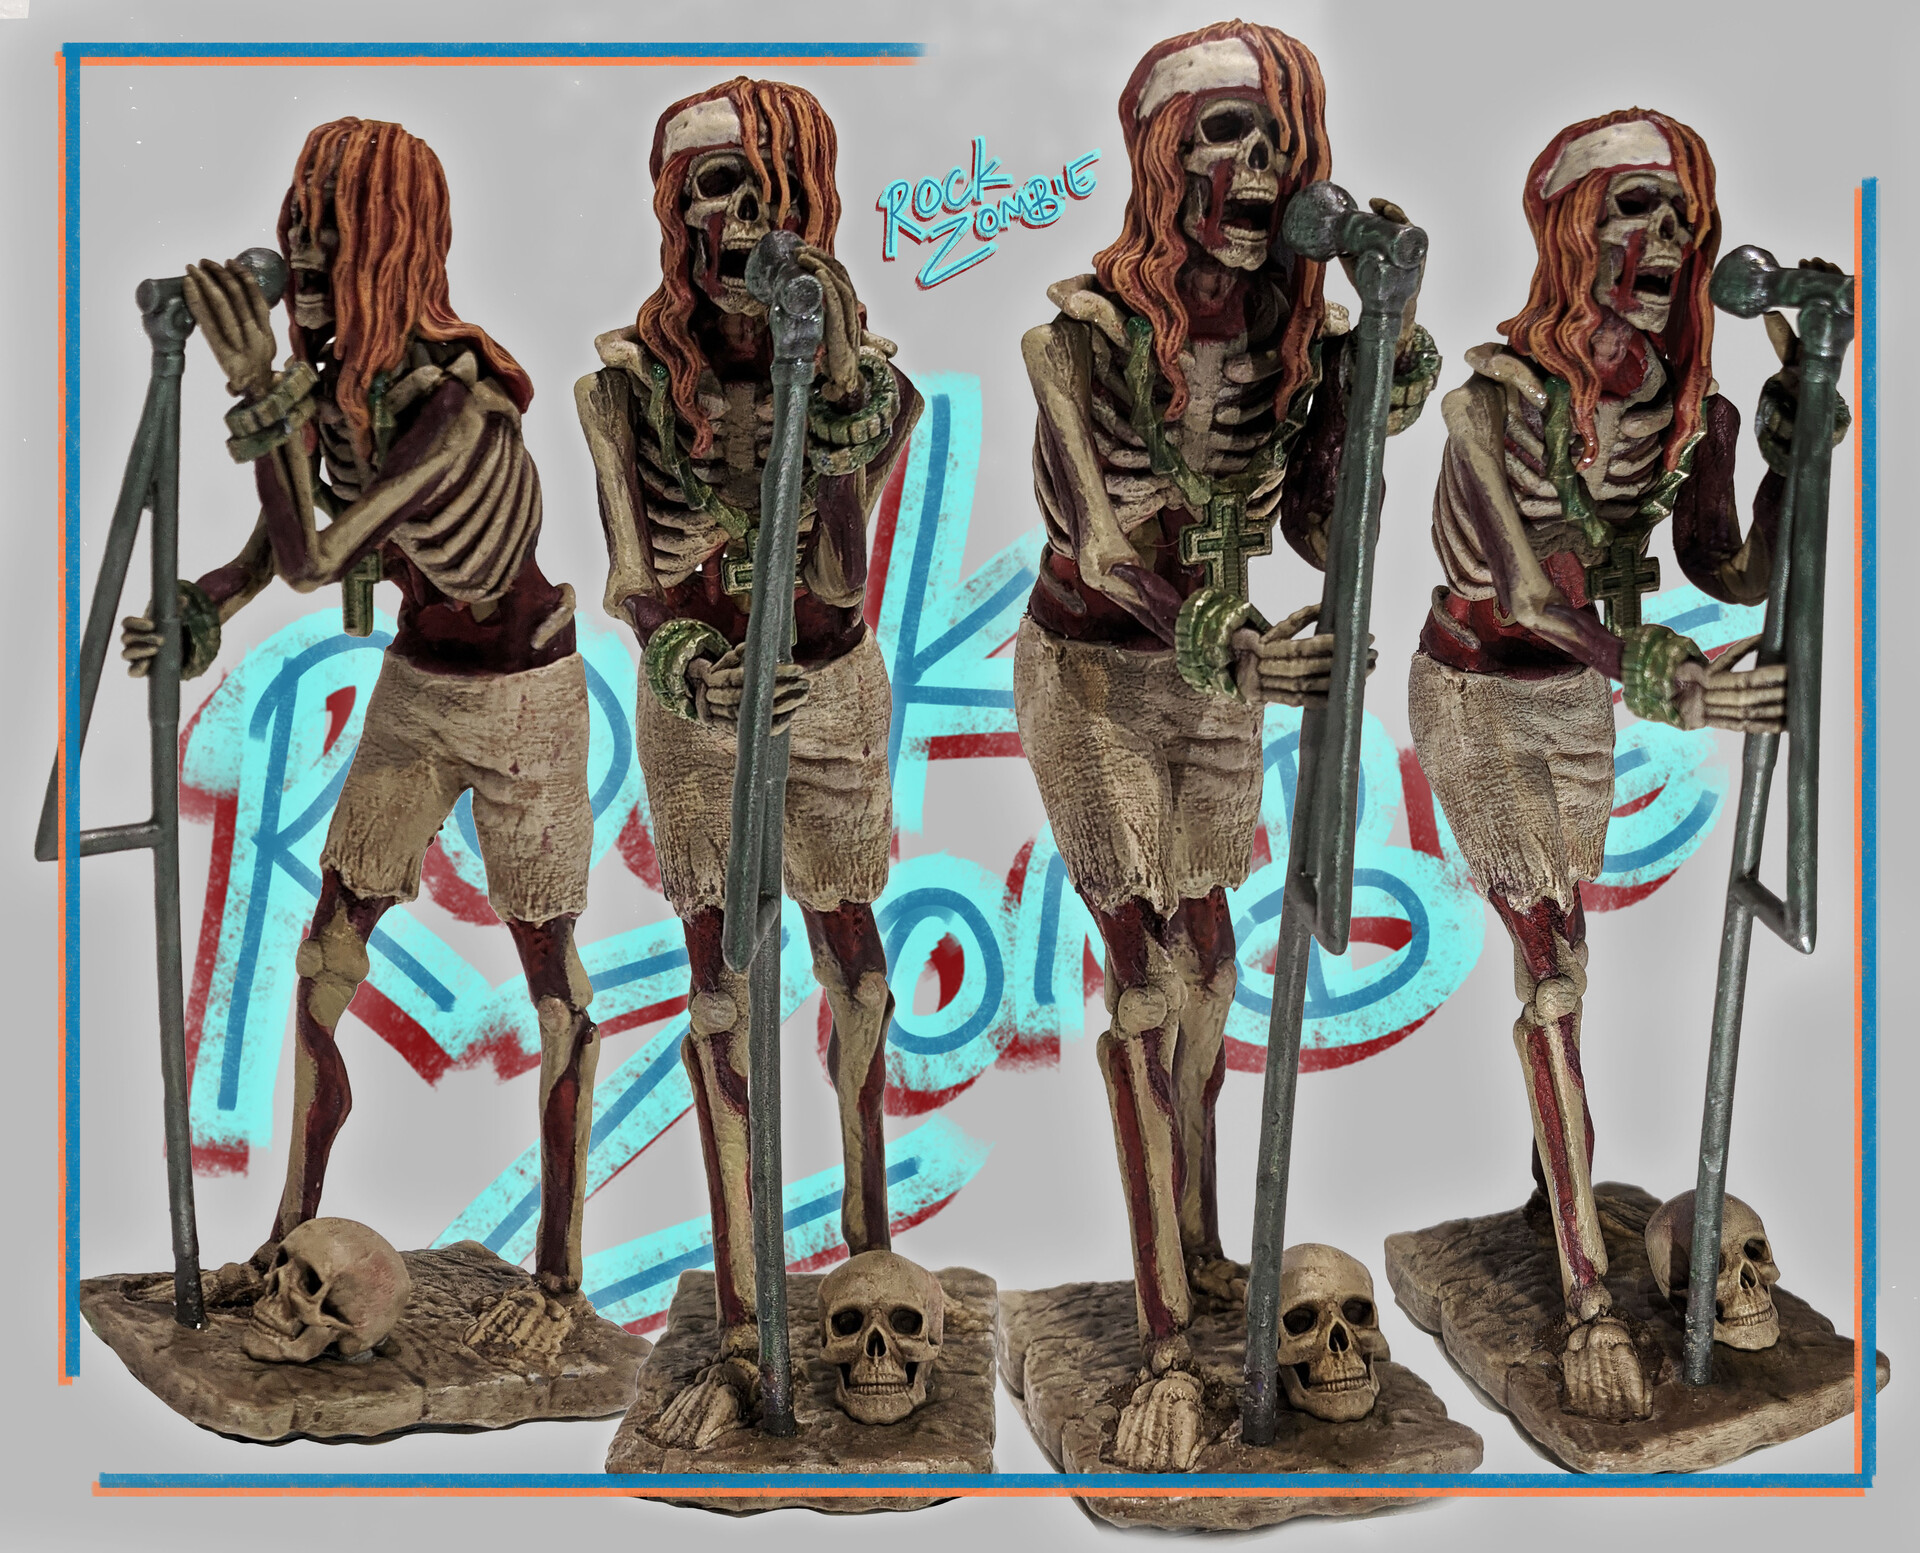
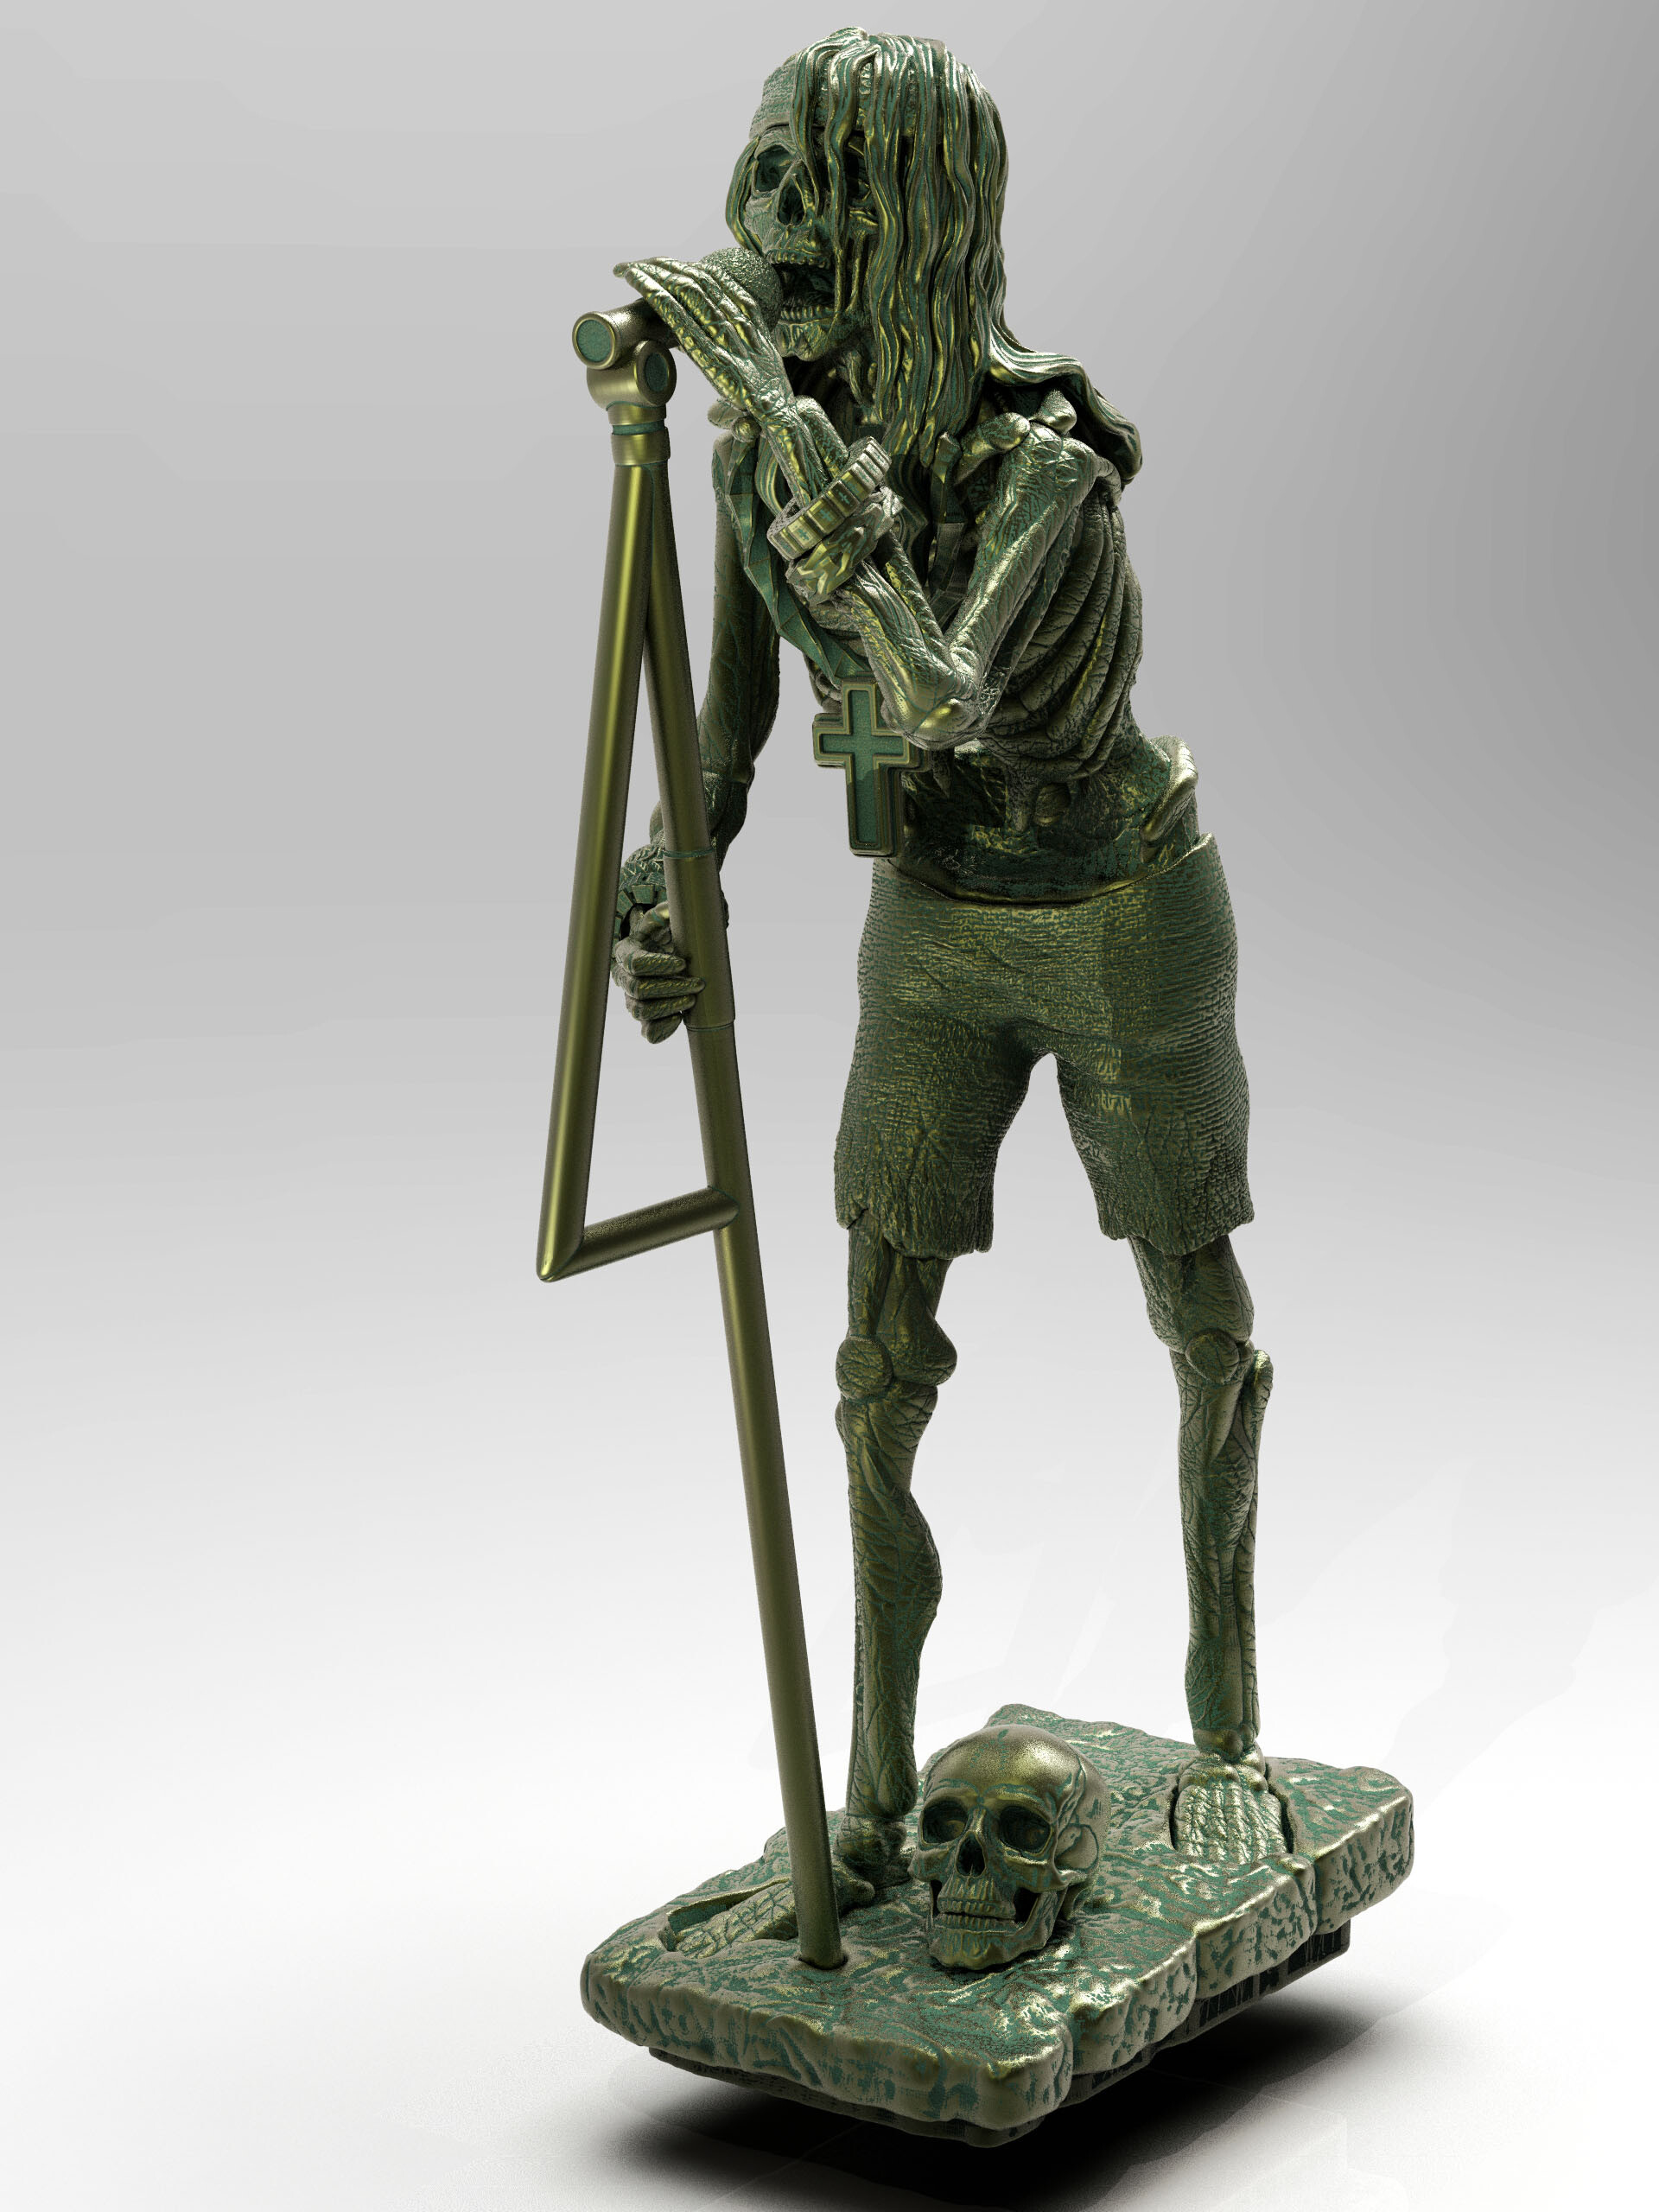
final prototype 3D print
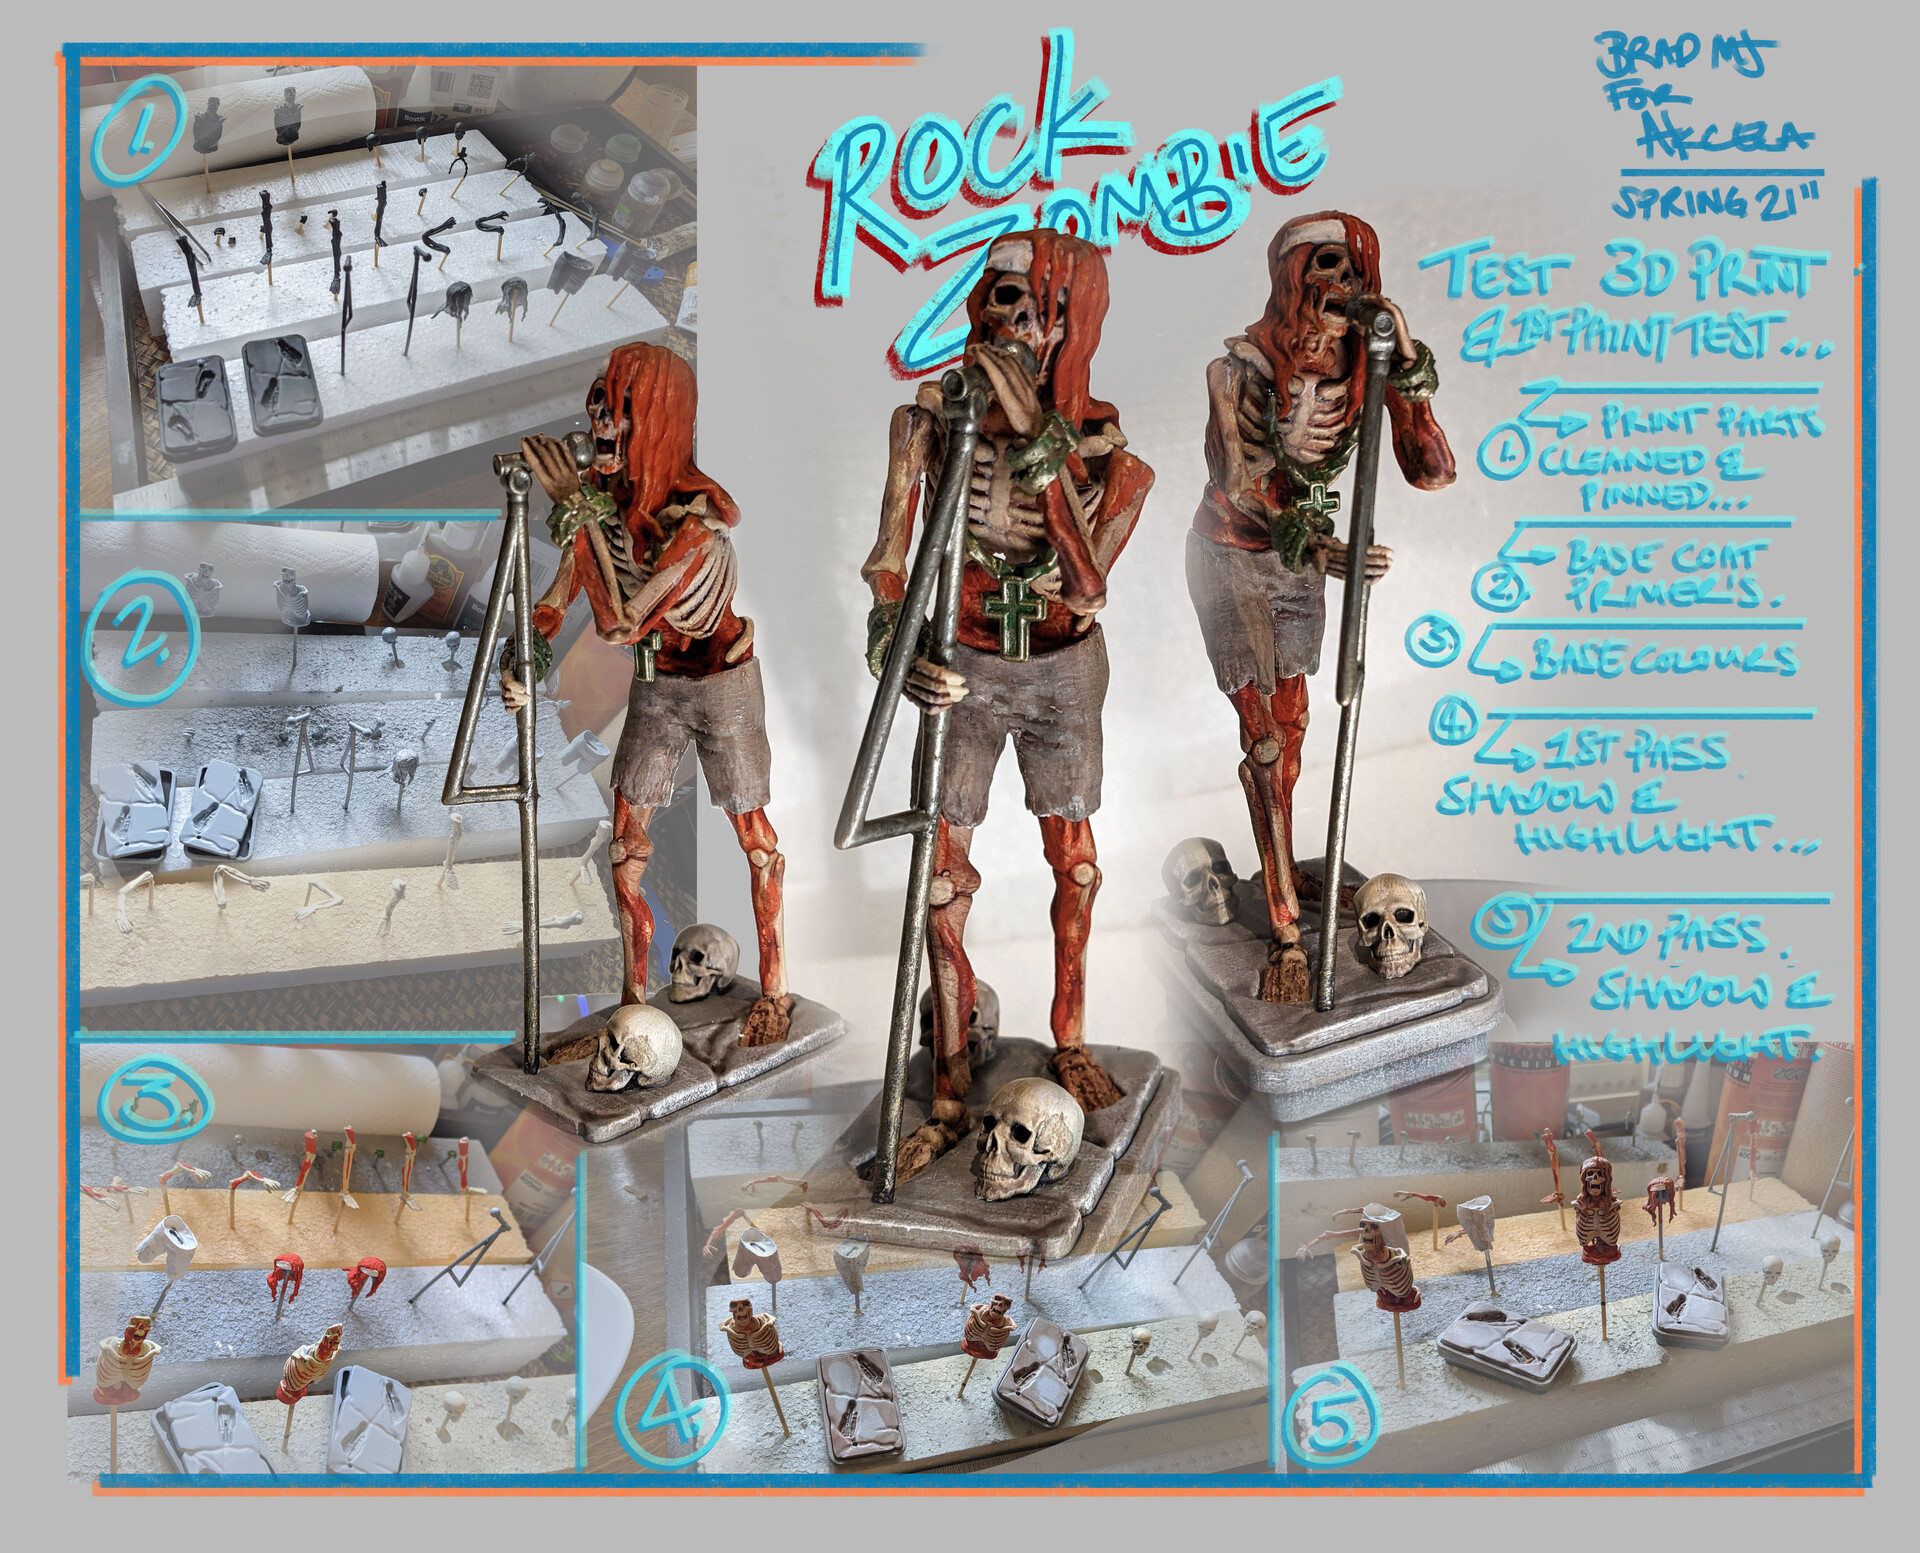
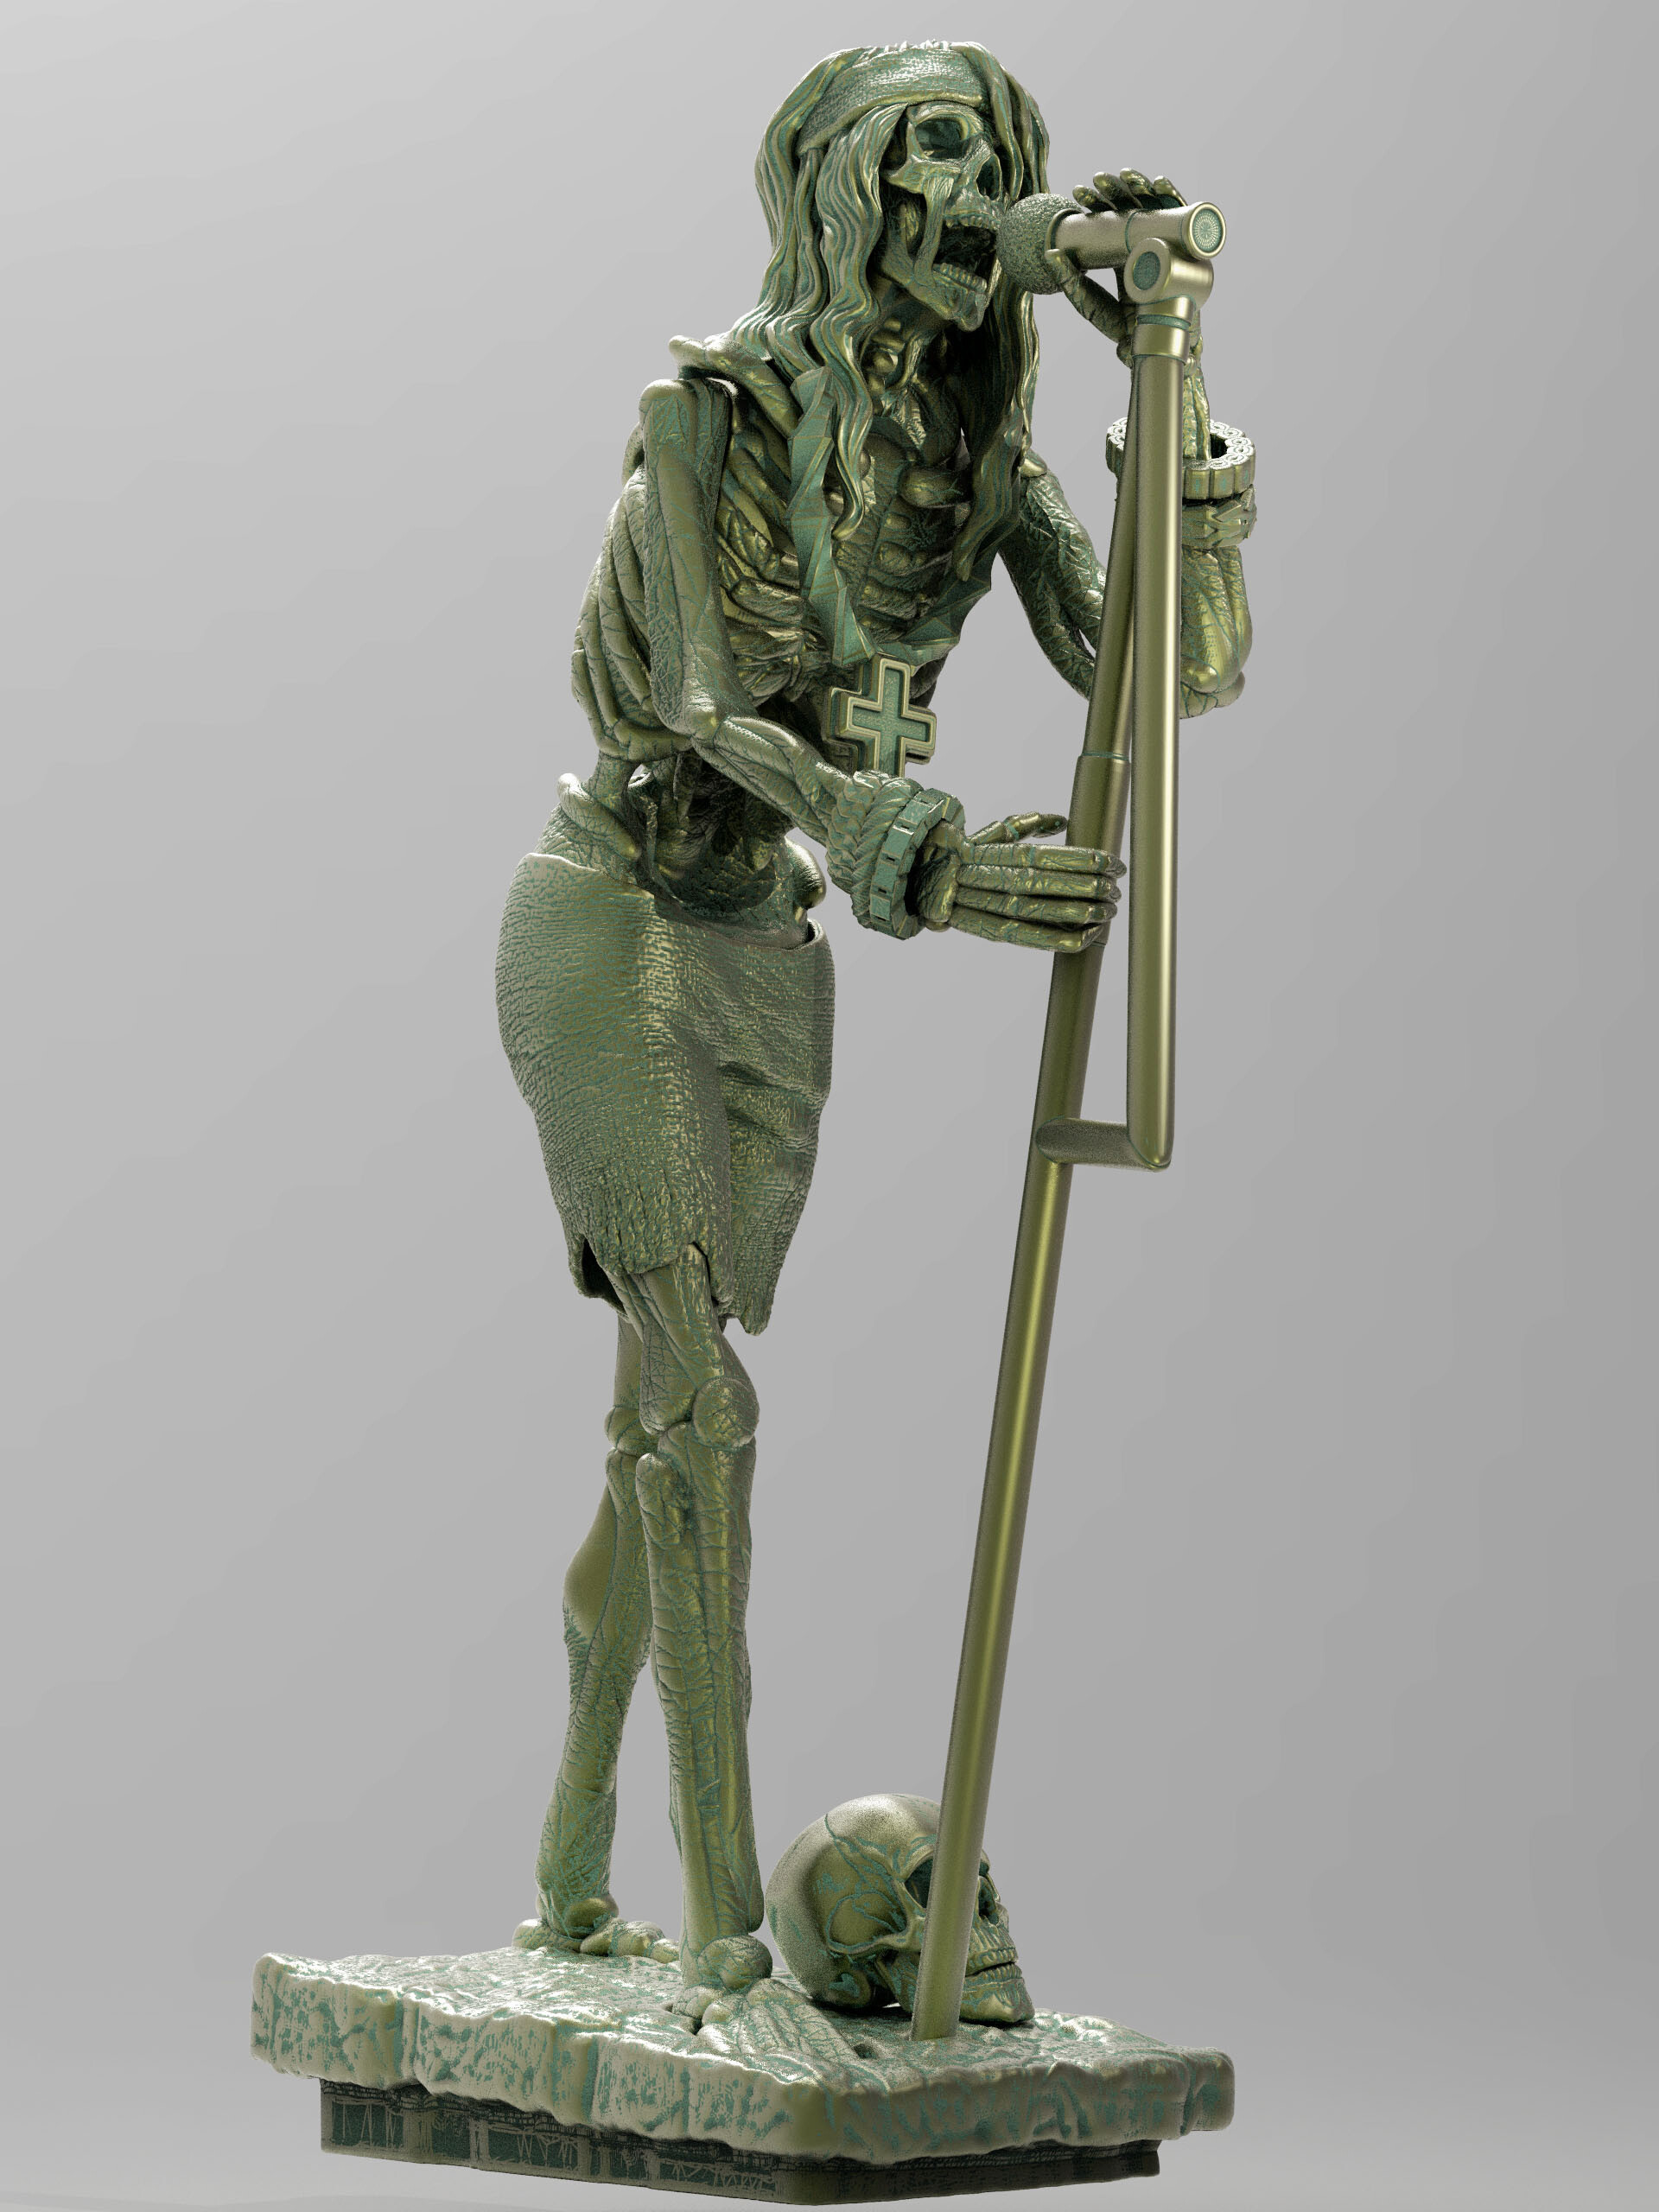
1st test print & test paint
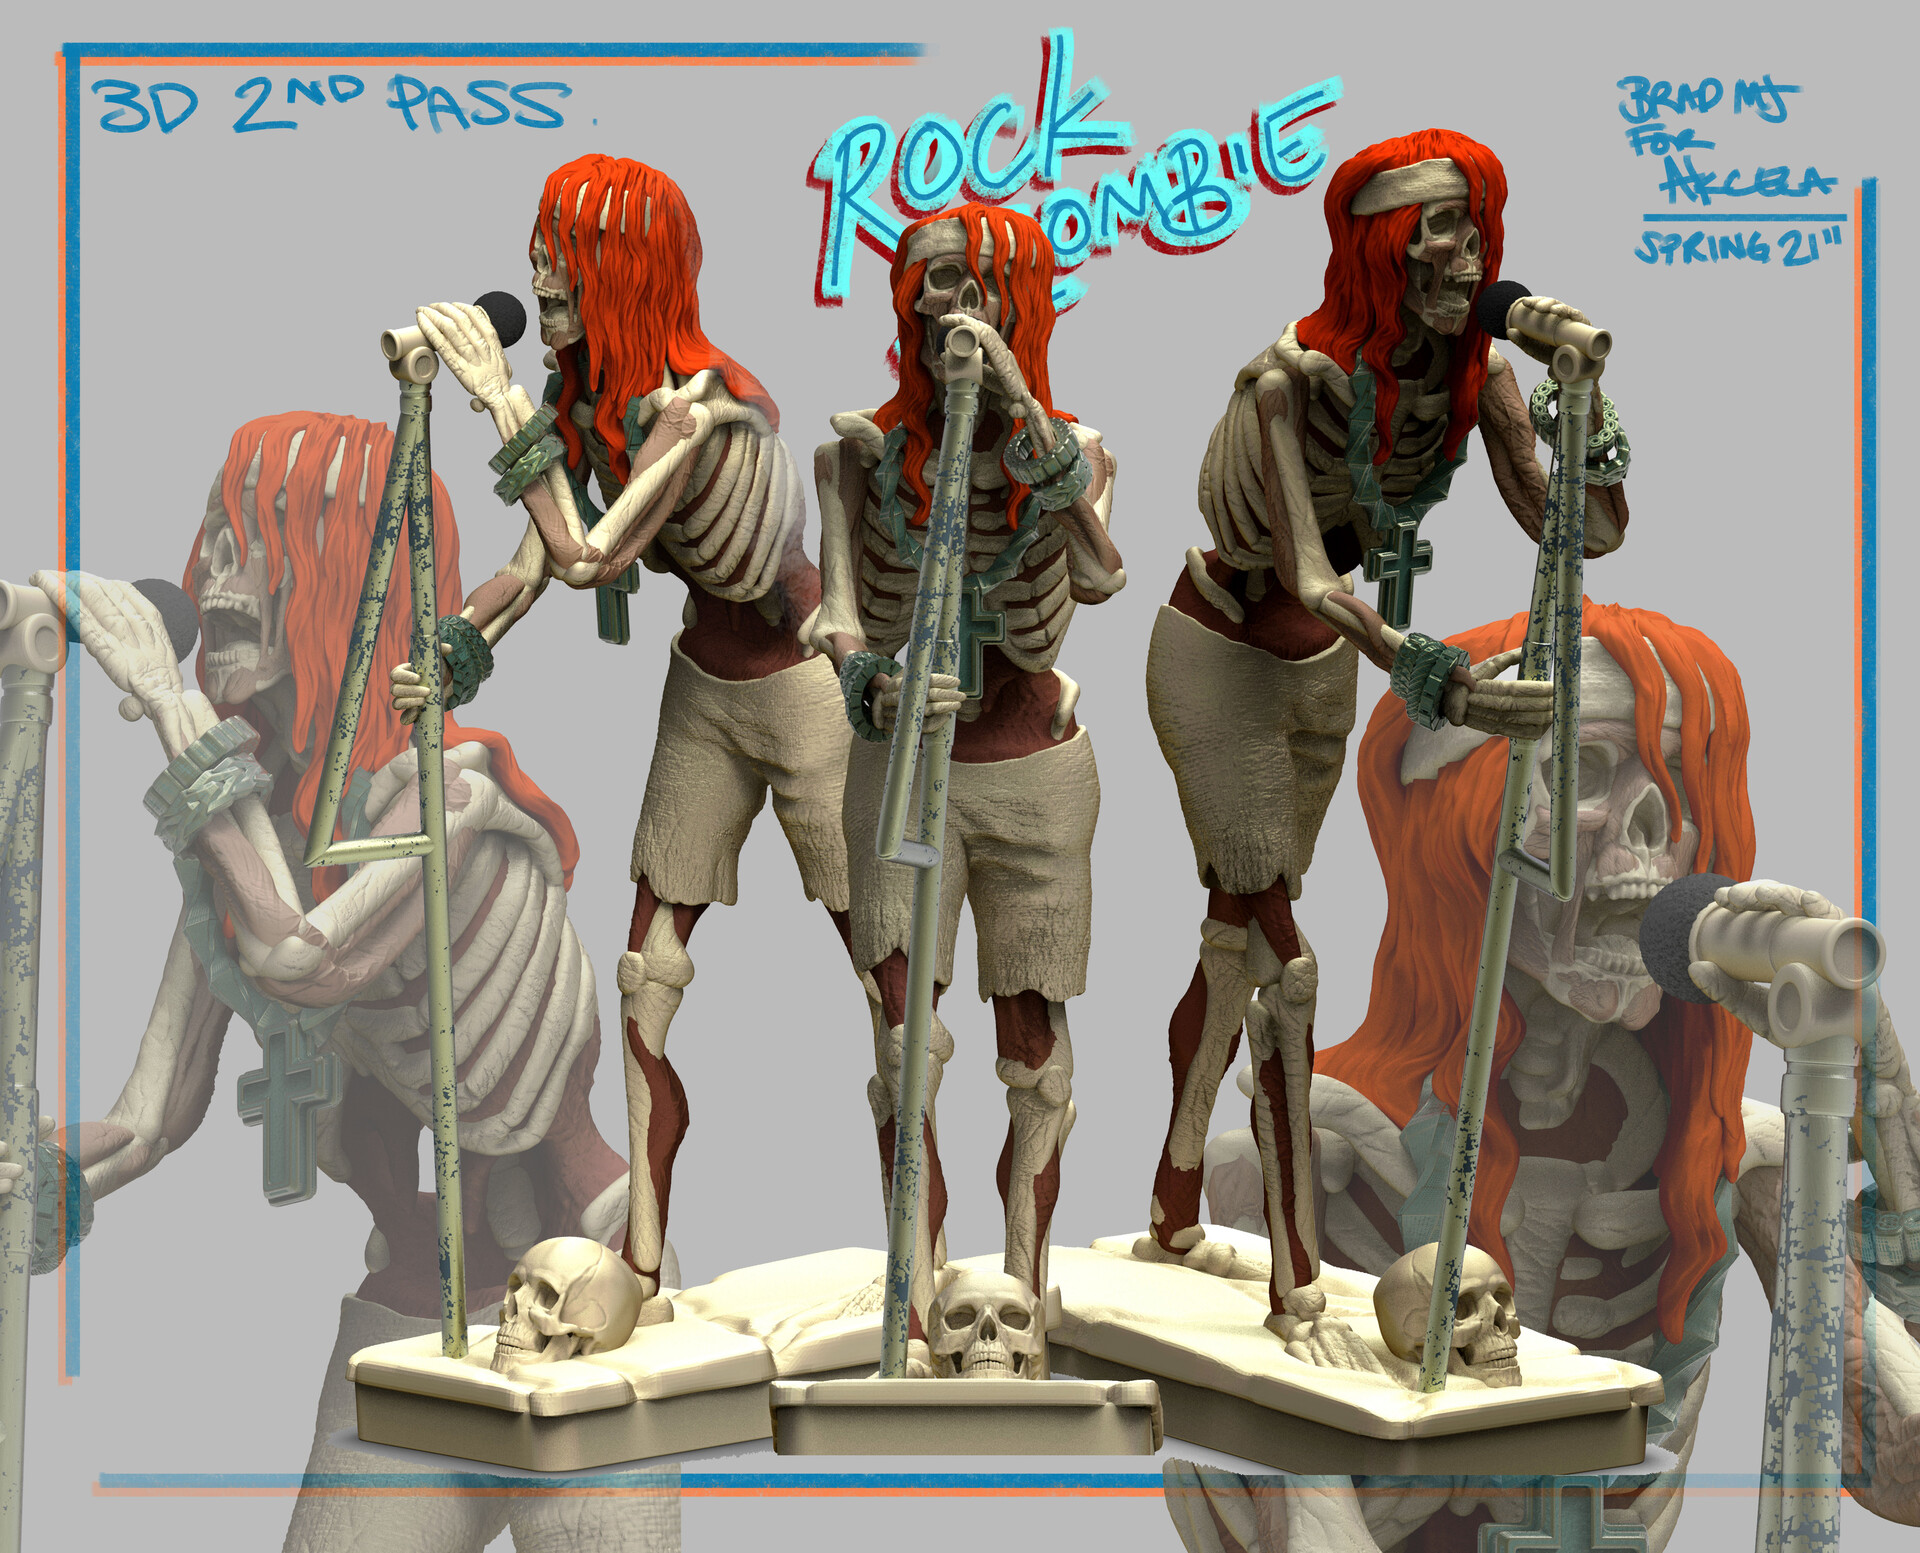
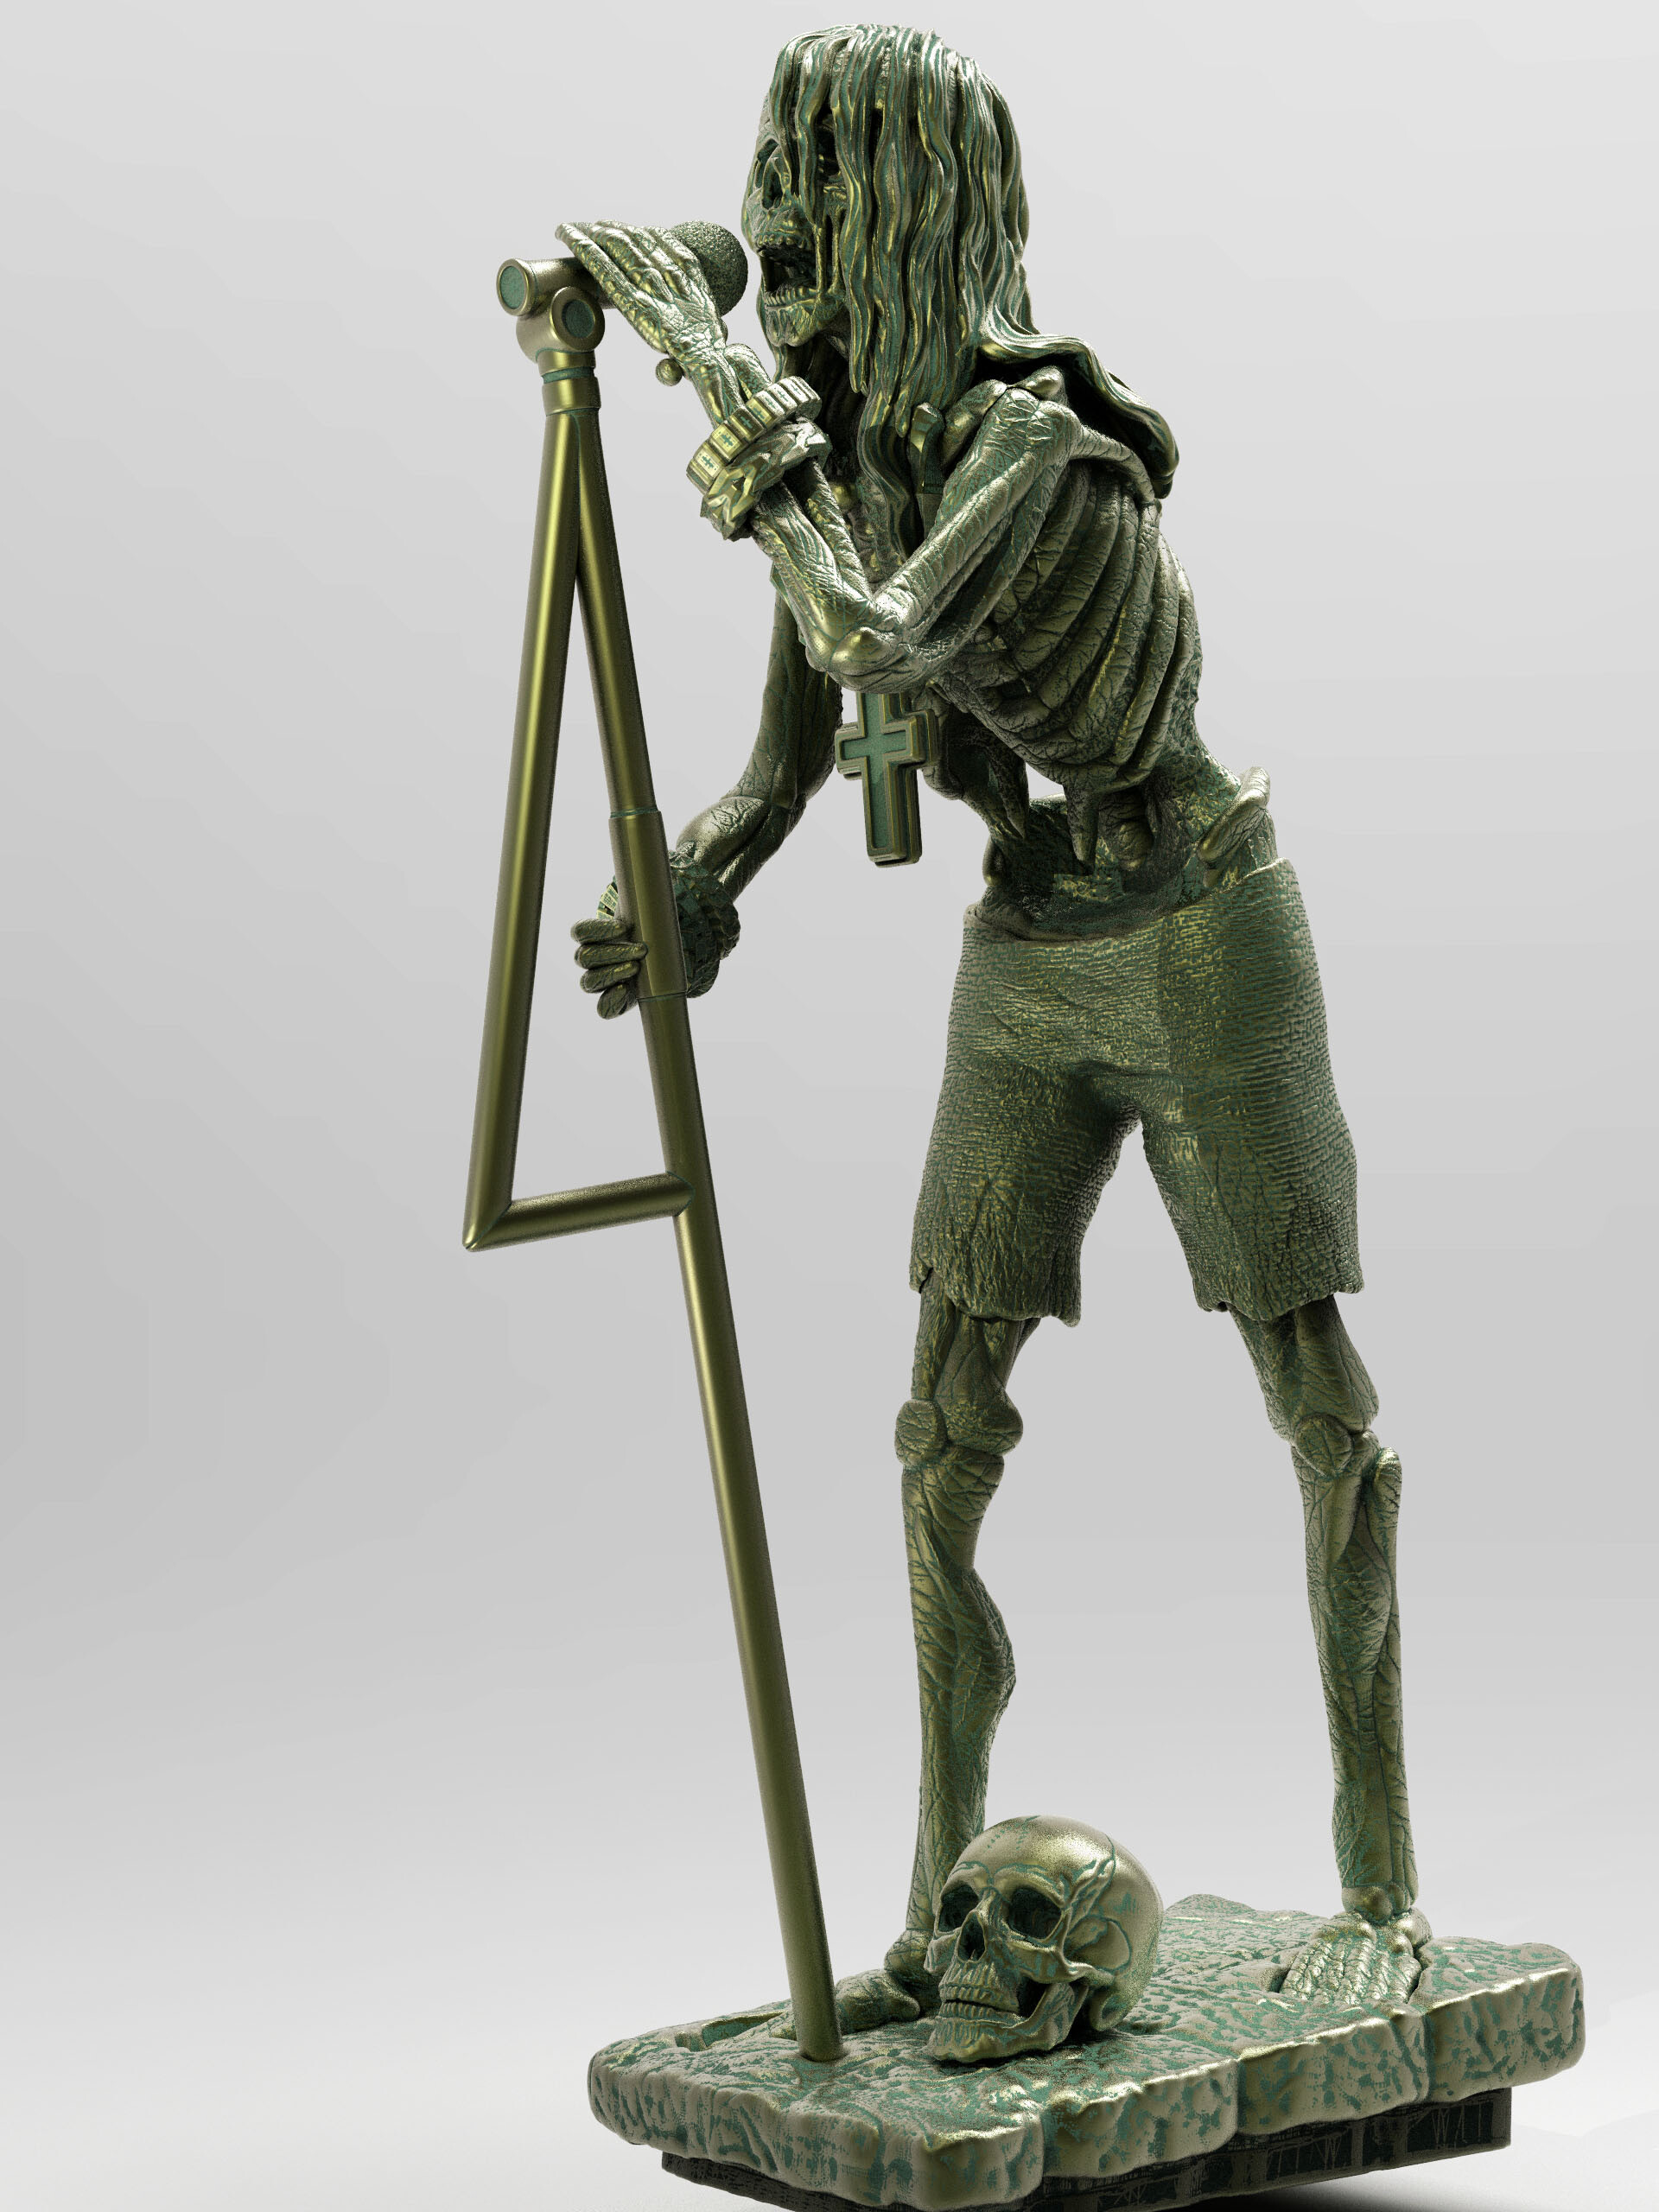
Z Brush 2nd pass
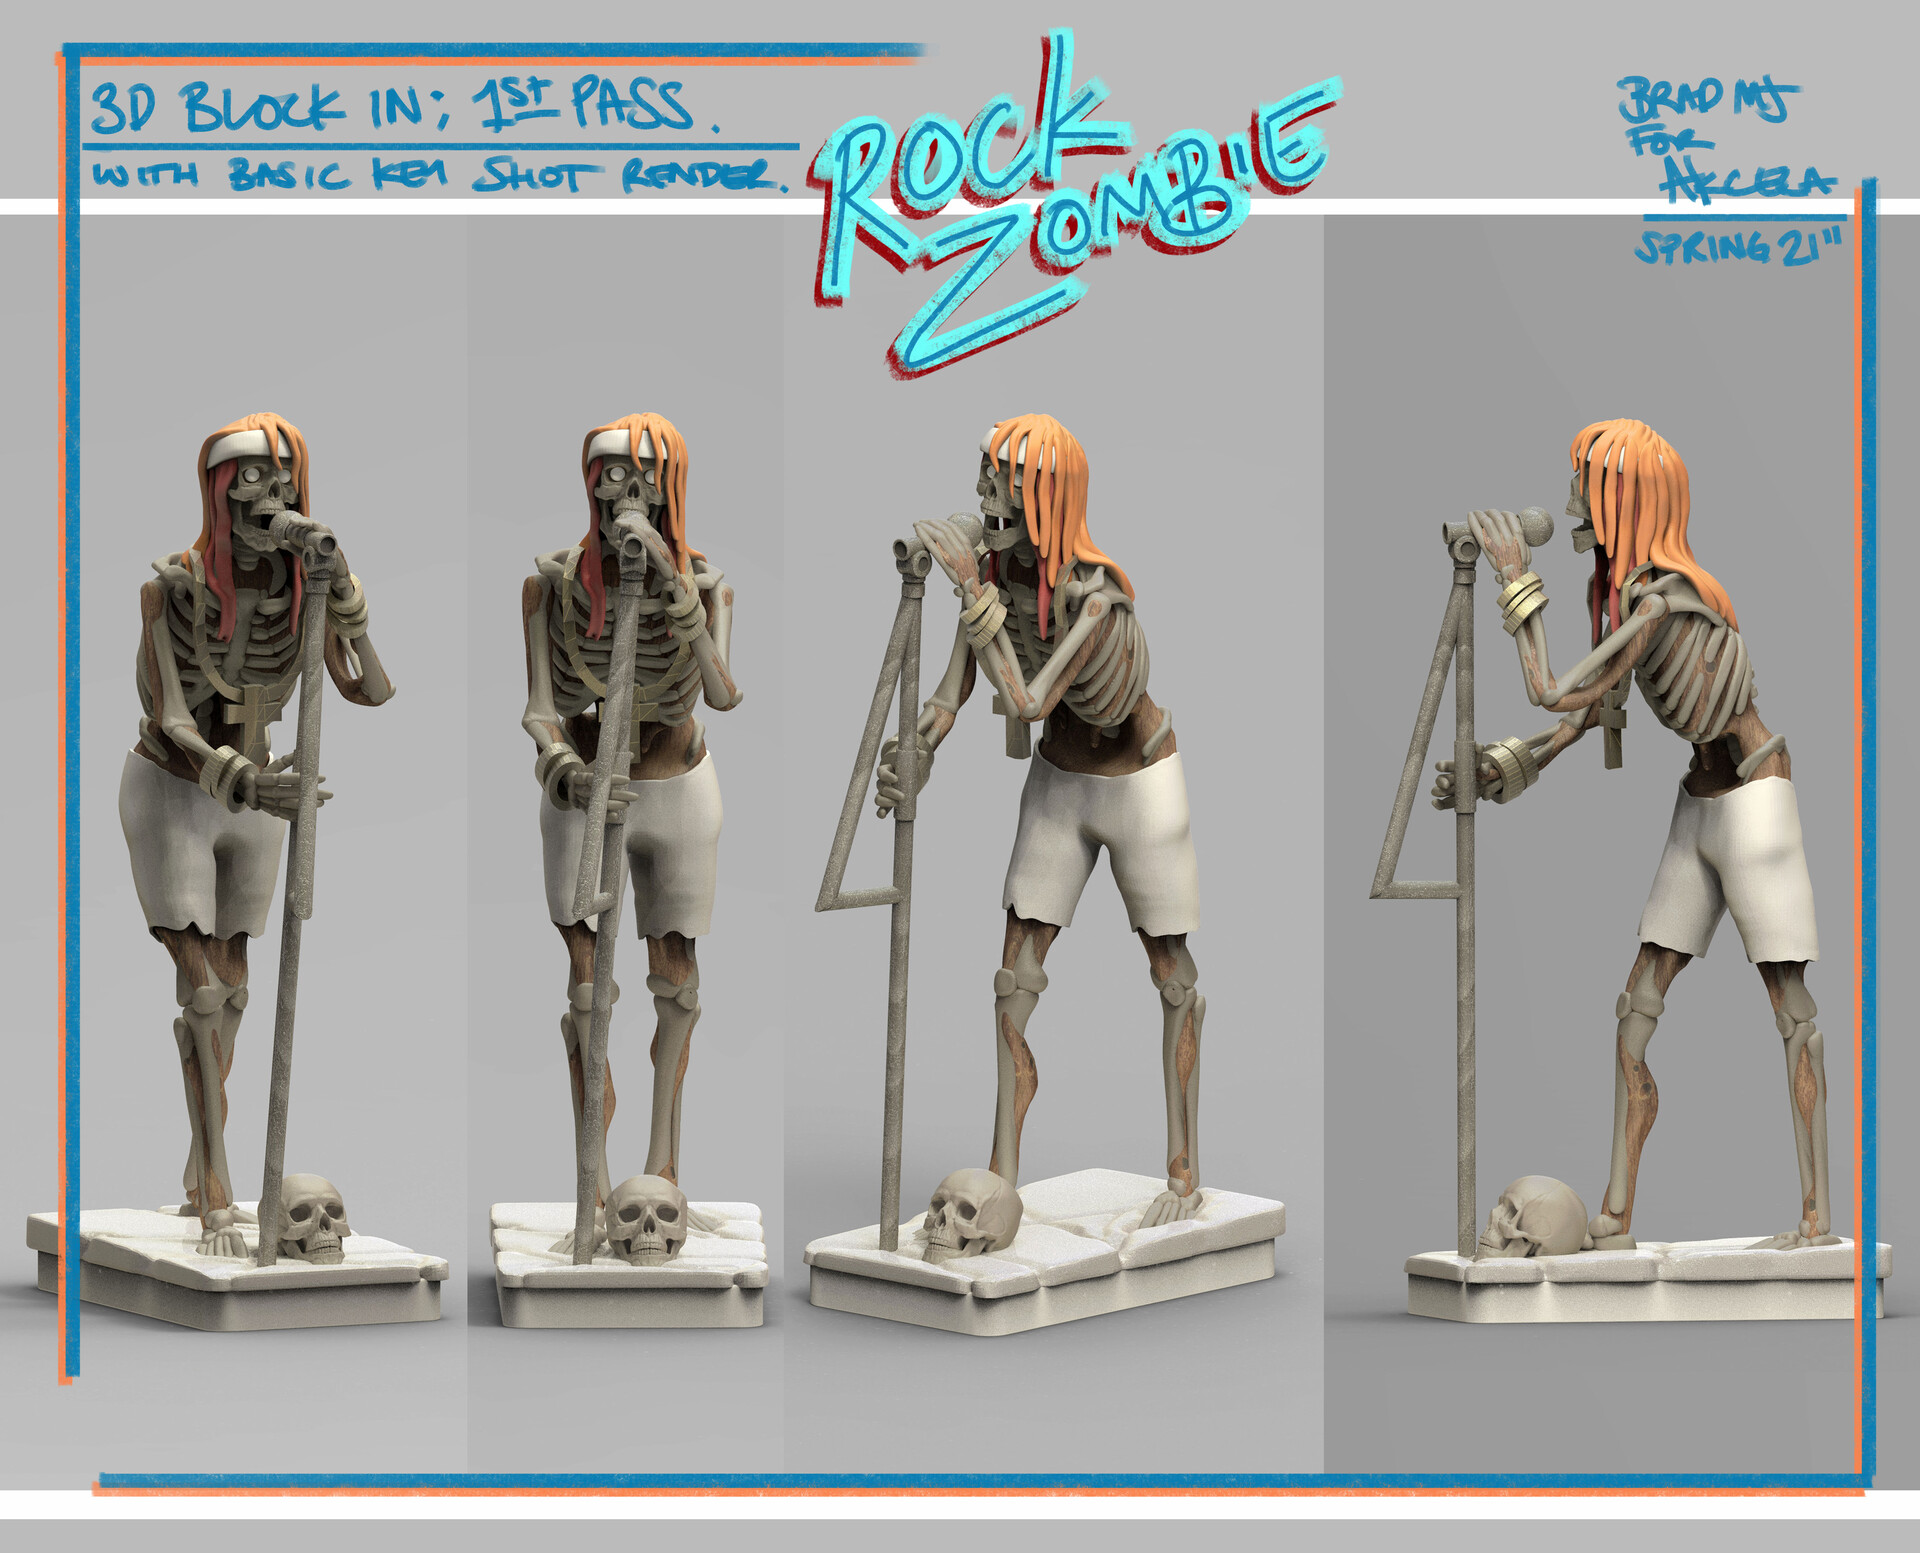
z Brush 1st pass
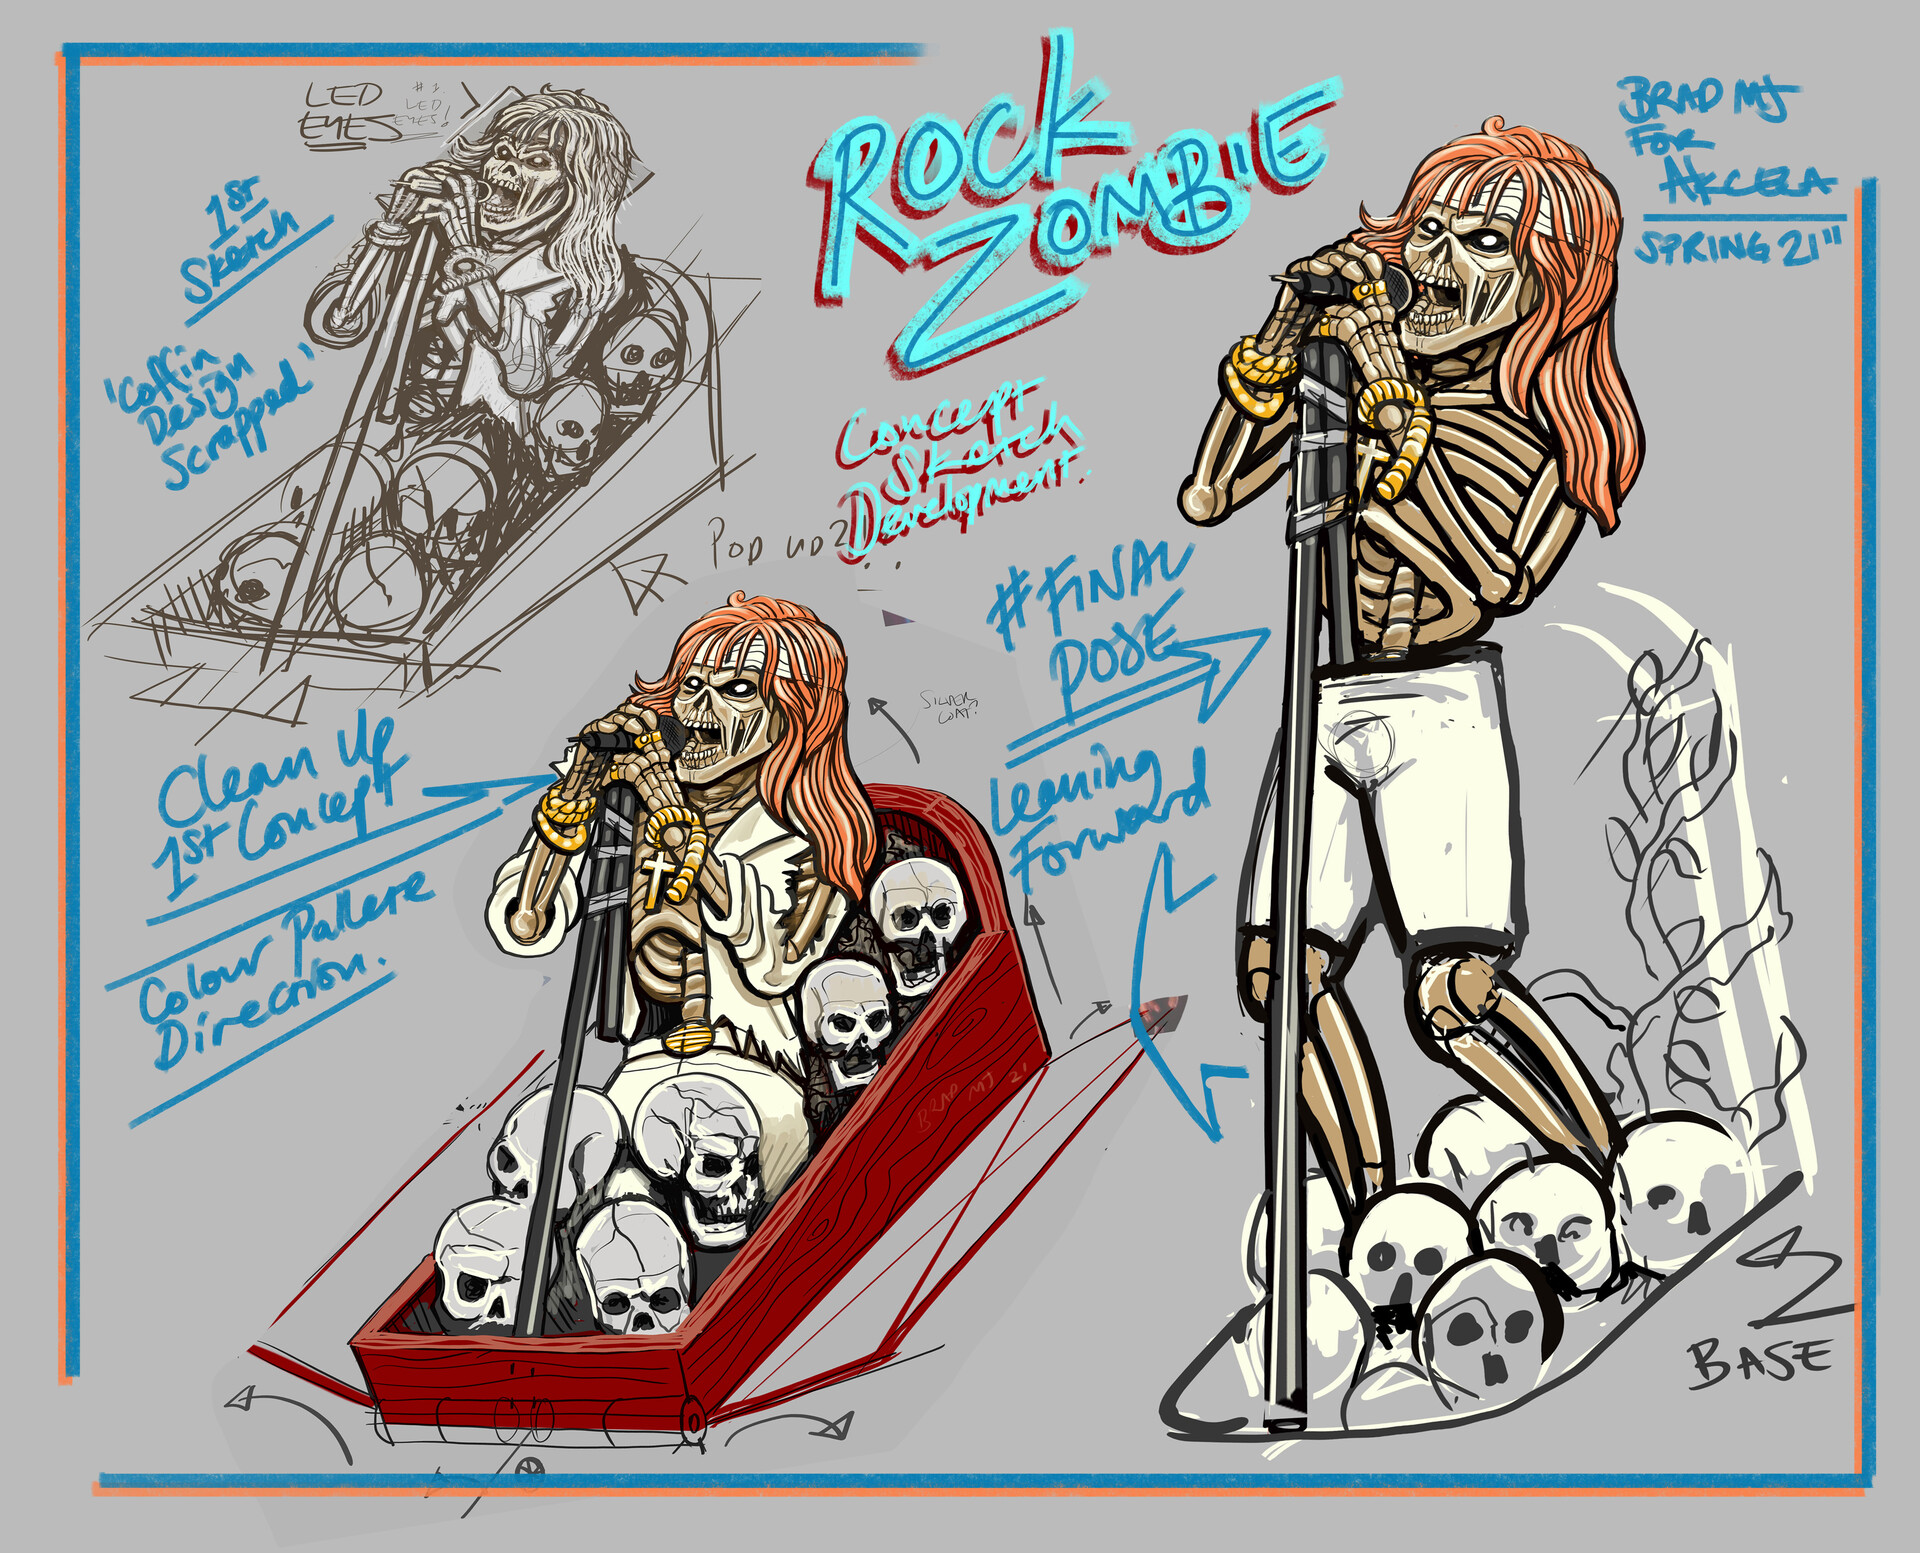
2D concept development

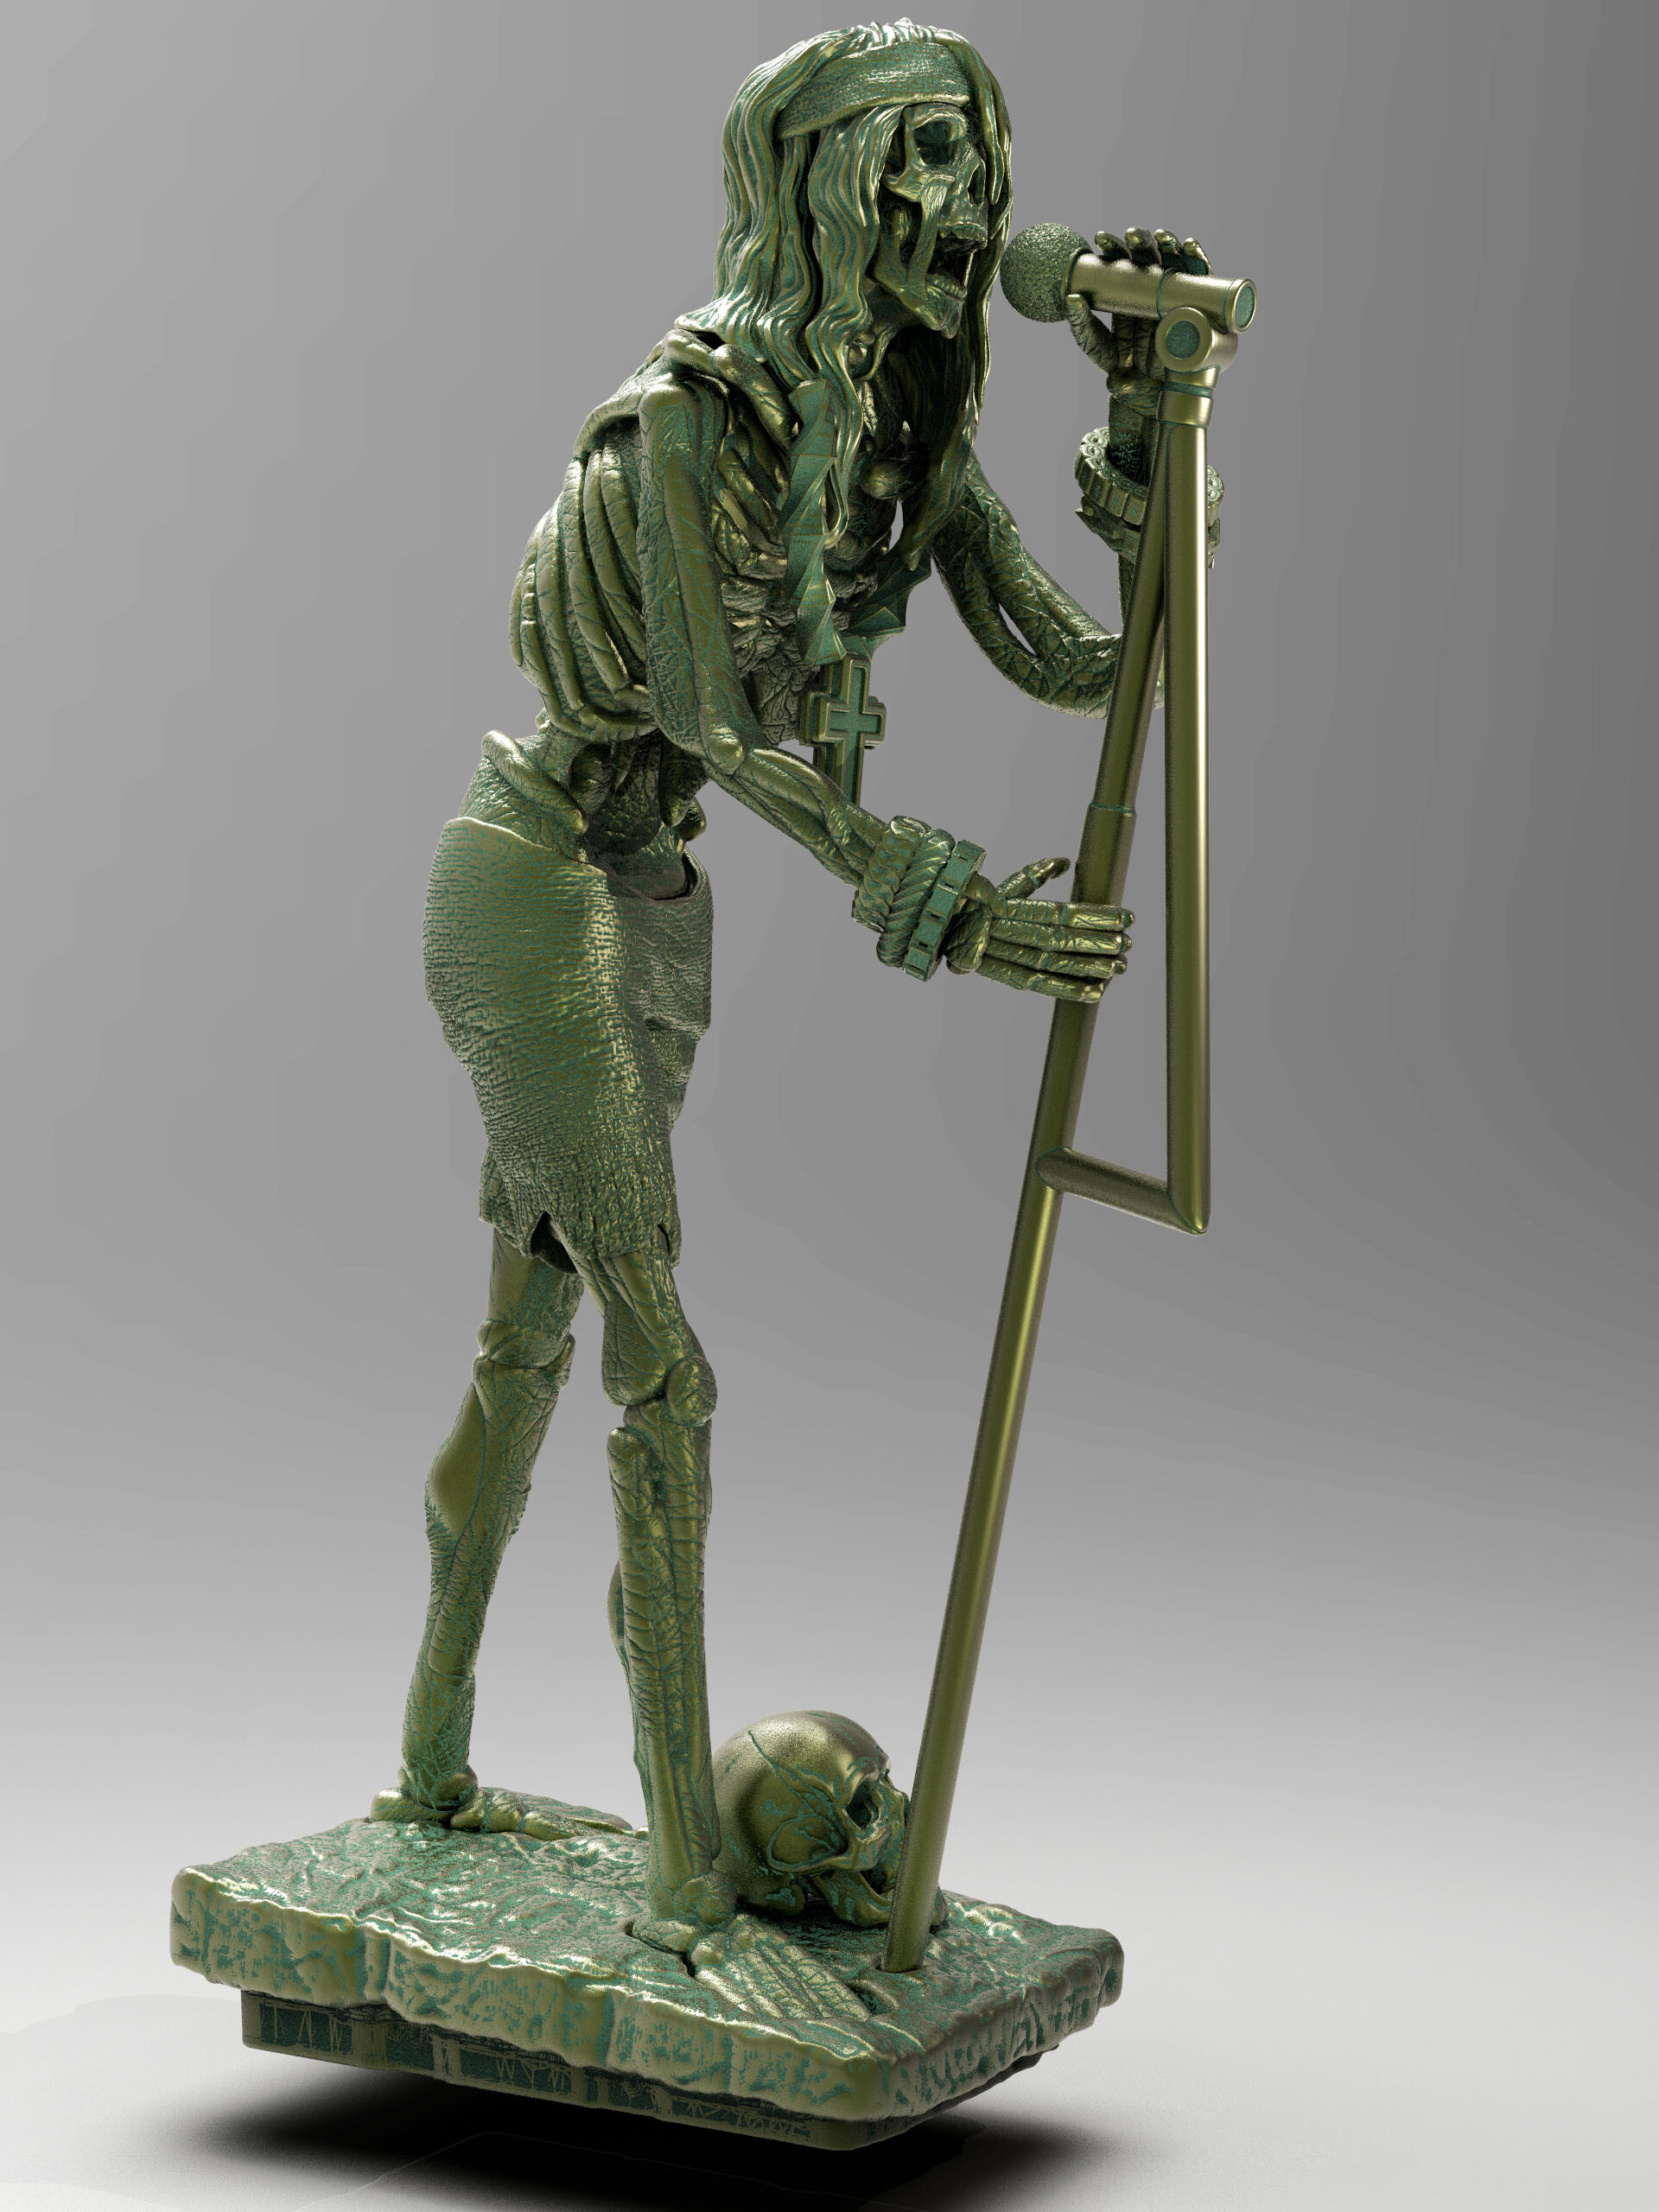
Rock Zombie
Break Down
Overview:
The client brief was to realise a ‘Rock Zombie’ Topper’ for a custom pin ball machine accessory; It was a loose brief which I enjoy as there is the opportunity to help set the goals, pipeline and schedule: I wanted to give an overview breakdown of this process to give hiring clients and freelancers an insight into a ‘2D/3D/3D print’ workflow example, hopefully its helpful for people to see? Please consider the project is a rare example of an open brief & trusting client.
2D Concept Development:
There were only a couple of low-resolution reference images provided for the concept, the brief requirement was to create a new design with the reference as a guide. This led to a round of 2D sketch designs to act as an original concept to sign off before moving to the digital sculpting stage.
Digital Sculpt:
I enjoy developing original designs, from sketch 2D concepts in digital 3D; My main tool is Z Brush, which is really the only 3D software I need, given all its low poly & high poly aspects as well as powerful Boolean (Cutting) tools which are perfect for 3D print prototype development. If you need convincing, it’s the only software package Hasbro use to prototype all their action figures!
The basic breakdown of the digital sculpt on this job was getting the main forms and design blocked in and submitted for approval (1st pass & 2nd pass submission stages) before moving onto detail and parts break down.
3D Print parts preparation:
After the concept sculpt is approved by the client it was time to break the sculpt down into parts for test printing: the test print will then determine which areas need further refinement. One of the advantages of breaking to parts is not only being able to print bigger models, but the ease of painting prior to assembly.
Prototype print prep & paint:
The prototype print parts were not the highest resolution and at the client’s initial scale there was a loss of detail as well as fragile elements. We decided to proceed with the paint test and then adjusted the 3D files to scale up the model roughly 25% which made a massive difference in achievable quality.
The paint comprised of base colours on a primer, with shade and highlight passes. The 1st test paint was brighter than needed and the palette was toned down for the 2nd, larger scale figure.